

I have been in need of a new shoe rack because the one I have is too size deficient to fit all of my twelve pairs. I am the Imelda of my two room, no EIK, studio apartment. I was originally using a shoe rack that I turned into a coffee table, but then turned back into a shoe rack, as my shoe rack. But once I bought those two wedges from the DSW Shoe Warehouse a dilemma occurred. It was either, through the process of shoe osmosis, donate two pairs to achieve storage equilibrium or get a bigger rack. And while I realize I haven’t really worn my colorful Adidas hightops for a while, a little piece of me kept saying some day I will wear them again. Maybe in Los Angeles, where I don’t really have to walk much.
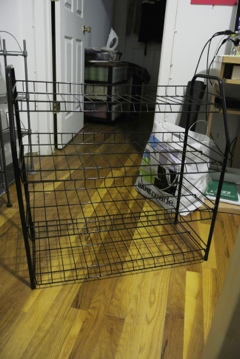
I finally broke down and got a bigger one at the 99 cent or more store. (Why does this thing not have a ‘cent’ key?!!!) I found this lovely piece for about ten dollars, that’s almost 10 times the price of a 3 pack shower cap set. What?!
Anyways… I wanted the top part to just be a surface where no shoes would be allowed. No shoes for you! (Imagining the Soup Nazi talking to the top rack.) You know a place to set your bag when you come home. I wanted a nice pretty surface so I decided to make it myself.
I first went to Home Depot to get some wood. I swear, do I have a huge sign on my forehead that says ‘WOMAN’? How am I suppose to know I can’t get wood cut by this guy, but have to go to that guy? UGH! It’s like the French Connection of hardware.
I eventually got a lovely piece cut to size with a pretty knot on it. I then sanded and applied a couple coats of polyurethane on both sides.
I originally wanted to put some photos of bands I shot, but thought it might seem too dated after a couple of years. I mean it’s not like I shot The Beatles. Who is this Crystal Castles???
I then decided to pull out some of my old 35mm slides and sifted through them. There were a lot of boring shots of flowers and squirrels (though not enough of those in my opinion. Hey me…remember when that squirrel jumped on your back? LOL!) Yes, alot of boring shots, but for some reason I kinda liked them. So I ended up glueing them to the wood piece.
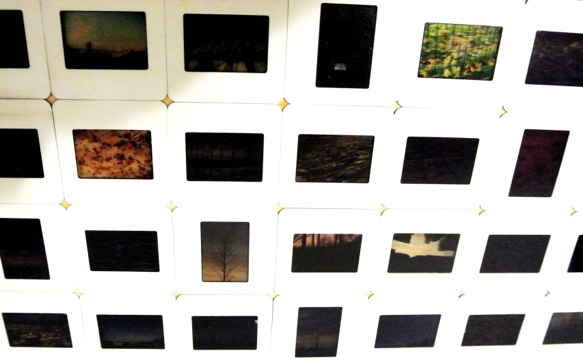
I didn’t fill up the whole wood because I wanted to show off the knot, so I glued around it with some Elmer’s wood glue. Yeah that’s right, I have wood glue in my tool box. YES! I HAVE A TOOLBOX TOO! IT’S ACTUALLY A PLASTIC CONTAINER, BUT THAT’S NOT THE POINT…
I then decided to frame around the knot with the slides.
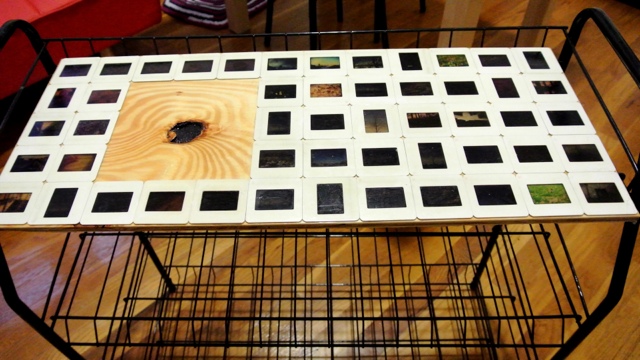
After glueing I applied a few more coats of polyurethane to seal the cardboard slide mounts.
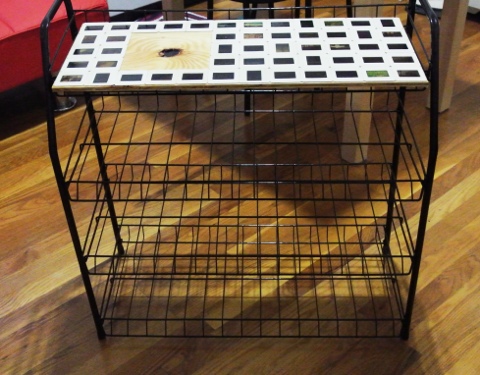
Now I have a lovely shoe rack. This was a fun project, but realized pictures that are lighter or contrastier will work better. Guess I’ll be pushing my E-6 processing a stop or two. If you stick a flash light next to the slides you can see the darker images better. But now I know for my next project what types of shots show up better.
Next stop…a coffee table. I’ll need to take more photos with my film camera, or maybe I can have my dad ship me my old stock of red carpet stuff. Um…maybe not. =|

1 Comment